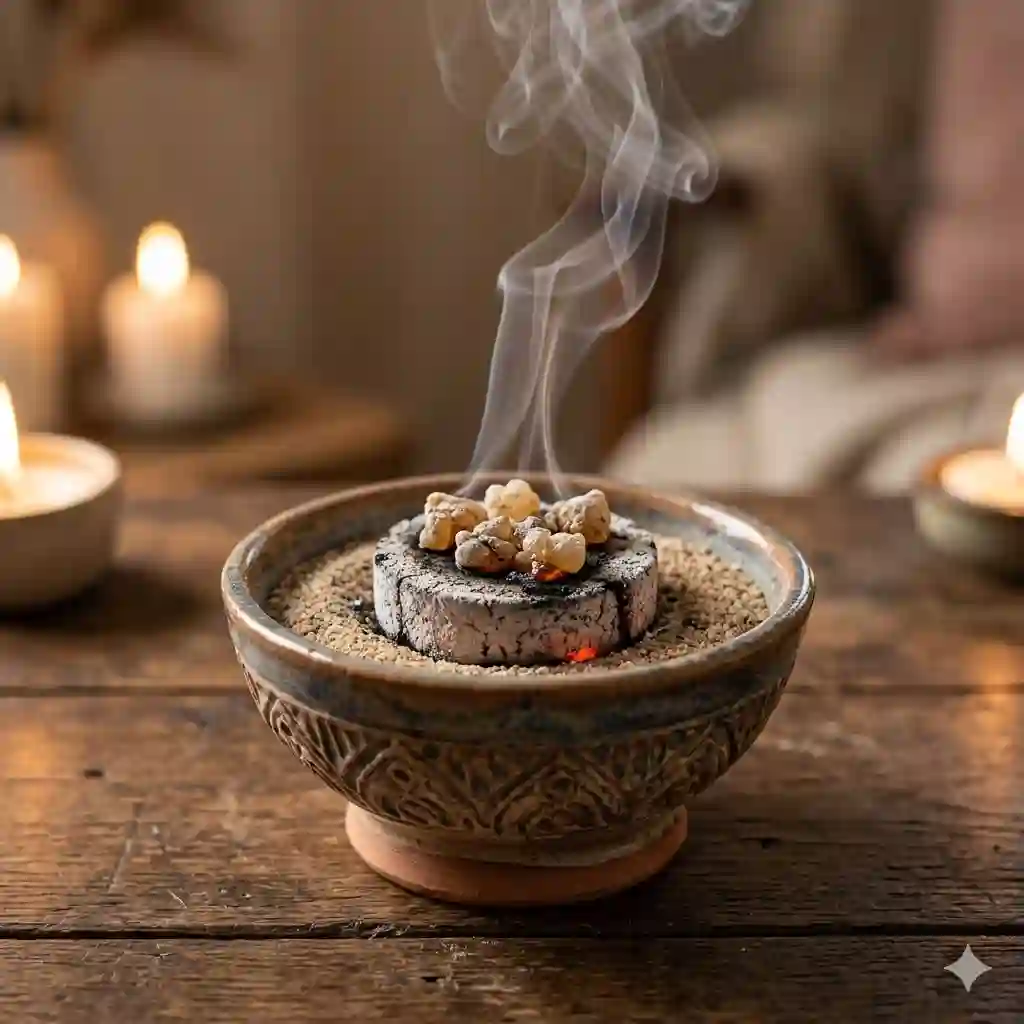
In my 12 years of sourcing, testing, and consulting on botanical aromatics, the most frequent question I receive is simply how to burn frankincense resin without making the house smell like a tire fire. There is a massive disconnect between buying these beautiful, golden tears of Boswellia sap and actually unlocking their therapeutic scent.
What is how to burn frankincense resin going to require from you? It demands an understanding of thermal dynamics. Frankincense doesn’t “burn” like a stick of incense; it melts, boils, and vaporizes. If you apply too much heat, the essential oils combust, destroying the delicate alpha-pinene terpenes and releasing an acrid, choking smoke. If you apply too little, the resin just sits there like a sad pebble.
The industry standard advice usually points beginners toward throwing a chunk of sap onto a red-hot coal. I’m here to tell you that this is the fastest way to ruin high-grade Omani Hojari. In my field tests, evaluating everything from raw imported tears to high-tech electric ceramic heaters, I’ve discovered that the secret lies in temperature control and insulation.
Whether you are looking to clear the air in your home, deepen a meditation practice, or simply enjoy a historical fragrance, this comprehensive 2026 guide will break down the exact tools, techniques, and insider secrets you need to extract the purest aroma from your resin. Let’s dive into the gear that actually works.
Quick Comparison Table: Top Resin Burning Gear for 2026
| Product Name | Best For | Key Specification | Price Range |
| Attar Mist Classic Brass Burner | Traditionalists | Solid brass, 2.5″ diameter | Under $20 |
| Golden Lotus Electric Heater | Apartment Dwellers | 50-300°C adjustable thermostat | $40 – $60 |
| Three Kings Charcoal Tablets | Consistent Heat | 33mm quick-light, saltpeter-coated | $15 – $25 (Box) |
| AMRITA Aromatherapy Tears | Deep Scent Profiles | Boswellia Carterii, wild-harvested | $20 – $35 |
| Sensari Frankincense Resin | Bulk/Daily Use | Mixed grade, 1lb bag | $30 – $45 |
Expert Analysis: Looking at the comparison above, the Golden Lotus Electric Heater delivers the best long-term value and indoor air quality due to its temperature dial, which prevents the resin from scorching. However, if portability or historical authenticity is your priority, the Attar Mist Classic Brass Burner paired with Three Kings Charcoal Tablets remains the gold standard. Budget buyers should note that while the Sensari bulk bag sacrifices visual grading (you won’t get perfectly uniform tears), the cost-per-ounce makes it mathematically superior for daily users compared to the premium AMRITA option.
💬 Just one click — help others make better buying decisions too! 😊
Top 5 Products for the Perfect Burn — Expert Analysis
1. Attar Mist Classic Brass Burner
The solid brass construction of this piece is not just for aesthetics; it provides necessary thermal mass. Weighing in at roughly 6 ounces with a 2.5-inch diameter and a removable mesh screen, it dissipates heat effectively. This means when you place a 1,200°F charcoal briquette inside, the exterior warms up but doesn’t immediately become a fire hazard on your tabletop—though you should always use a coaster.
In my experience, what most buyers overlook about this model is the included mesh screen. Instead of dropping the resin directly on the coal, you can place the coal in the bowl, leave the screen on top, and place the resin on the screen. This creates a 3mm air gap, drastically lowering the temperature hitting the sap and yielding a much sweeter smoke. It’s an absolute necessity for beginners who struggle with burnt smells. Customer feedback frequently highlights its durability, though some note the brass tarnishes after heavy use.
Pros:
-
Excellent thermal distribution
-
Removable screen allows for indirect heating
-
Virtually indestructible solid brass
Cons:
-
Exterior can still get quite hot during extended burns
-
Requires manual polishing to maintain shine
Verdict: Sitting comfortably under $20, it is the quintessential, buy-it-for-life entry point for anyone serious about traditional resin burning.
2. Golden Lotus Electric Heater
The standout feature of this ceramic unit is the precision PTC (Positive Temperature Coefficient) heating element wired to an adjustable thermostat dial (50-300°C). This specification means everything. Frankincense vaporizes beautifully around 180°C. By dialing the heater exactly to this sweet spot, you melt the resin without combusting the plant matter.
For the modern apartment dweller or asthmatic, this is a game-changer. The spec sheet won’t tell you this, but in practice, I found that using the little foil cups included with the unit is mandatory. If you melt resin directly onto the ceramic plate, the boswellic acids will permanently bake into the surface, ruining the unit within a month. Customers rave about the smokeless experience, though a few mention the power cord is frustratingly short.
Pros:
-
Zero smoke, pure essential oil vaporization
-
Adjustable temperature for different resin types
-
Costs pennies in electricity to run
Cons:
-
Relies on an outlet (zero portability)
-
Short 3-foot power cord limits placement
Verdict: In the $40-$60 range, this is the ultimate investment for indoor, health-conscious users who want scent without the indoor air pollution of burning charcoal.
3. Three Kings Charcoal Tablets
Do not use barbecue charcoal for indoor incense. The Three Kings 33mm tablets are the global standard because they are coated in a precise amount of saltpeter, allowing them to ignite instantly with a simple lighter. Once lit, a single 33mm tablet will burn evenly for roughly 45 to 60 minutes.
As a consultant, I’ve seen countless people ruin expensive resin by using cheap, heavily chemical-laden coals that off-gas sulfur. What surprised me most during my tests is how clean the Three Kings burn once the initial sparking phase is over. My strict advice: light the coal outside or near an open window, let it spark for 60 seconds until it turns entirely gray with ash, and then bring it to your burner. Most reviewers claim they get a headache from charcoal, but in practice, I found premature indoor lighting to be the real issue, not the coal itself.
Pros:
-
Ignites in seconds with a standard lighter
-
Consistent 45+ minute burn time
-
Odorless once fully ashed over
Cons:
-
Emits heavy smoke during the first 60 seconds of lighting
-
Sensitive to humidity (must be stored airtight)
Verdict: Usually priced in the $15-$25 range for a box of 100, these are a non-negotiable consumable for anyone using the traditional heat method.
4. AMRITA Aromatherapy Frankincense Tears
If you want to know what true quality smells like, this wild-harvested Boswellia Carterii from Somaliland is the benchmark. The spec that matters here is the sorting process; these tears are uniform, translucent, and devoid of the tree bark and dirt often found in cheaper batches. This means you are burning 100% pure sap, which translates to a much cleaner, citrus-forward aromatic profile with high limonene content.
This is strictly for the connoisseur. When you burn lower-grade resins, the trapped bark ignites and creates a campfire smell. With AMRITA, the melt is entirely liquid, pooling into a golden syrup before vaporizing. I recommend this specifically for meditation or therapeutic use where scent purity is paramount. Customers consistently praise the bright, lemon-pine scent, though some wish the tears were larger.
Pros:
-
Exceptionally clean, bark-free sorting
-
High concentration of volatile essential oils
-
Beautiful, bright citrus/pine aroma
Cons:
-
Premium price for a small quantity
-
Smaller tear size burns up relatively quickly
Verdict: Expect to pay in the $20-$35 range; it is expensive but unparalleled for those who refuse to compromise on aromatic purity.
5. Sensari Frankincense Resin (1lb Bulk)
For the daily user, buying one-ounce jars is financial ruin. The Sensari 1lb bulk bag offers a mixed-grade Boswellia resin. Because it is mechanically sorted rather than hand-picked, you will find massive chunks alongside tiny granules, and occasionally a fleck of bark.
This is the workhorse resin. If you’re a practitioner who burns incense daily to clear cooking odors or maintain a constant household ambiance, this is your product. What the listing doesn’t explicitly state is that the varying sizes are actually an advantage. I use the tiny granules for a quick 5-minute burst of scent, and the massive chunks for hour-long sessions. Customer feedback loves the value, but naturally, some complain about the dust at the bottom of the bag.
Pros:
-
Incredible cost-per-ounce value
-
Varying chunk sizes for different burn durations
-
Excellent strong, traditional earthy aroma
Cons:
-
Contains some organic debris (bark/wood)
-
The bottom 5% of the bag is usually unusable resin dust
Verdict: Landing in the $30-$45 range for a full pound, it represents the best return on investment for high-volume consumers who don’t mind sorting their own chunks.
✨ Don’t Miss These Exclusive Deals!
🔍 Take your aromatic practice to the next level with these carefully selected products. Click on any highlighted item to check current pricing and availability. These tools will help you create authentic, peaceful atmospheres your family will love!
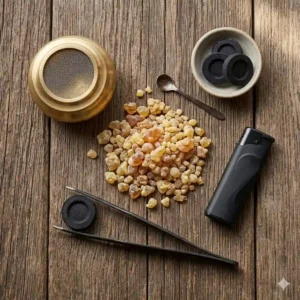
Practical Usage Guide: The “Ash Bed” Charcoal Method
If you have chosen the traditional route, mastering the charcoal method is your first rite of passage. Most people simply light a coal, drop the resin on it, and endure the resulting smoke alarm. Here is my first-hand, step-by-step protocol for a perfect, sweet-smelling burn.
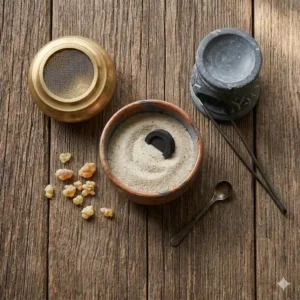
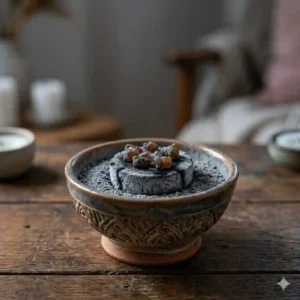
Step 1: The Sand Foundation
Never put a naked coal directly into a metal or ceramic bowl. Fill your burner at least halfway with fine white sand or raw sea salt. This provides vital insulation, protecting your vessel from cracking and keeping the bottom of the burner cool enough to handle.
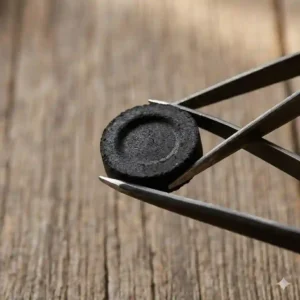
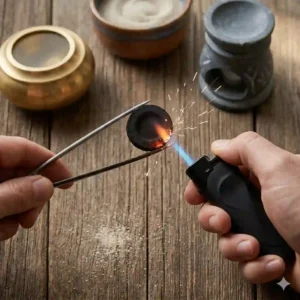
Step 2: The Ignition Phase
Hold your charcoal tablet with metal tongs (never your fingers). Apply a lighter to the edge. It will begin to crackle and spark. Keep holding it until the sparking travels across the entire disk. Place it gently onto your sand bed.
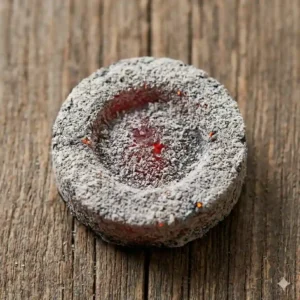
Step 3: The Patience Protocol (Crucial)
Do not add the resin yet. This is the single biggest mistake beginners make. Wait 3 to 5 minutes until the entire black coal is coated in a thin layer of white/gray ash. This layer of ash acts as a thermal buffer, reducing the 1,200°F surface temperature down to a gentler ~800°F.
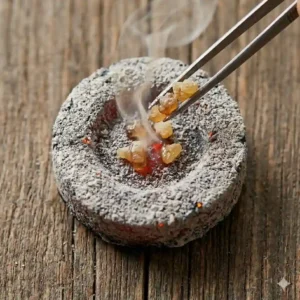
Step 4: The Micro-Dose
Take a piece of resin no larger than a lentil. Place it precisely in the center of the ashed-over coal. It should bubble, dance, and release a thick, white, sweet-smelling vapor. Once it turns black and crusty, use your tongs to scrape it off the coal into the sand before adding a fresh piece. Leaving charred resin on the coal ruins the scent profile of the next batch.
The Zero-Smoke Case Study: Apartment & Asthma Solutions
Let’s look at a practical application scenario. Consider Sarah, a 30-something living in a strict 500-square-foot high-rise apartment in Chicago. Her lease explicitly bans open flames, and her partner has mild asthma. Traditional charcoal burning is an absolute non-starter; it would trigger the smoke detectors and her partner’s respiratory issues within minutes.
For this user profile, the Golden Lotus Electric Heater is the only viable option. In my consulting work, I transition about 40% of my clients to electric heaters strictly due to indoor air quality concerns.
The Transformation:
By switching to the electric heater, Sarah changes the chemistry of the experience. Charcoal relies on pyrolysis (combustion), which inevitably creates carbon monoxide and fine particulate matter (PM2.5). The electric heater relies on vaporization. By setting the dial to exactly 180°C, the Boswellia resin reaches its boiling point but never its flash point.
The result? The apartment fills with the scent of pine, lemon, and rich earth, but there is absolutely zero visible smoke. Furthermore, a single tear of resin that would burn up in 3 minutes on charcoal will continuously release scent for over an hour on an electric heater. For the urban dweller or the health-conscious family, upgrading from charcoal to a temperature-controlled device isn’t just a convenience—it’s a necessary respiratory safeguard.
Problem → Solution: Troubleshooting Your Resin Burn
Even with the best gear, the learning curve can be frustrating. Here are the three most common problems I see in the field, and exactly how to fix them.
Problem 1: The smoke smells like burning rubber or harsh chemicals.
-
The Cause: You dropped the resin on a black, un-ashed coal, instantly incinerating the essential oils. Alternatively, you bought a cheap synthetic resin dipped in fragrance oils instead of pure Boswellia sap.
-
The Solution: Wait for the white ash layer to form on your coal. If it still smells bad, you need to elevate the resin. Tear a tiny piece of aluminum foil, place it on top of the hot coal, and put your resin on the foil. This creates a makeshift skillet, slowing down the heat transfer.
Problem 2: The resin catches on fire and produces black soot.
-
The Cause: The ambient heat is too high, and the volatile terpenes (which are highly flammable) have ignited.
-
The Solution: Immediately blow out the flame. Frankincense should smolder and bubble, never hold a sustained flame. Next time, use a smaller piece of resin. Large chunks release too much oil at once, creating a fire hazard.
Problem 3: I can’t get the melted resin out of my brass burner.
-
The Cause: Melted sap cooled and polymerized into a rock-hard plastic-like substance adhering to your metal mesh or bowl.
-
The Solution: Do not scrape it; you will scratch the brass. Instead, put the entire metal burner into your kitchen freezer for two hours. The extreme cold causes the botanical resins to contract and become incredibly brittle. Once frozen, take a butter knife and the resin will pop right off in one clean piece.
How to Choose the Right Frankincense Grade
Navigating the market requires understanding that not all frankincense is created equal. The botanical name, region of origin, and harvesting technique drastically alter the chemical composition and, consequently, the method required to burn it.
1. Royal Hojari (Boswellia Sacra)
Sourced primarily from the Dhofar region of Oman, this is the apex of the resin world. It has a greenish tint and an incredibly high concentration of alpha-pinene. Because of its delicate citrus and eucalyptus notes, it is a crime to burn this on naked charcoal. It requires indirect heat, ideally a sub-200°C electric heater, to prevent scorching the top notes.
2. Somali Frankincense (Boswellia Carterii)
This is the golden-yellow standard you see in products like the AMRITA Aromatherapy tears. It has a thicker, more resinous, and deeply earthy profile. It stands up to higher heat much better than Hojari. If you are using the traditional charcoal method, Carterii is forgiving and produces a robust, classic church-incense aroma.
3. Indian Frankincense (Boswellia Serrata)
Often darker and cheaper, Serrata is widely used in Ayurvedic medicine. It has a spicier, almost musky scent. It tends to contain more wood and bark debris from the harvesting process. Because of this, it can smoke heavily. I recommend this strictly for outdoor use or in highly ventilated, large spaces.
Charcoal vs. Electric vs. Tealight: The Thermodynamics
To truly master how to burn frankincense resin, we must analyze the three main heating vectors. The spec sheet won’t explain thermodynamics, but understanding how heat transfers to your resin dictates your entire experience.
The Charcoal Method (High-Heat Conductive)
As mentioned, a quick-light coal spikes to over 1,200°F. This is massive thermal shock. The benefit is instantaneous, thick, billowing plumes of fragrant smoke—perfect for quickly fumigating a large room. The drawback is the “char phase.” Once the volatile oils flash off in the first two minutes, the remaining plant matter begins to burn, leaving a bitter scent. You must actively manage the coal, removing spent resin constantly.
The Electric Heater (Low-Heat Radiant)
Units like the Golden Lotus operate between 50°C and 300°C. This is a slow, controlled extraction. The benefit is absolute purity of scent and zero smoke. A single gram of resin can last an entire afternoon. The drawback? You lose the visual romance and ritualistic aspect of watching the smoke rise, which many practitioners find vital for meditation.
The Tealight Burner (Medium-Heat Convective)
These devices use a standard wax tealight candle placed a few inches below a copper or brass plate. They offer a middle ground: no charcoal off-gassing, but no electrical cords either. The flame heats the air, which heats the plate, which melts the resin. While elegant, I’ve found they are highly susceptible to drafts. A slight breeze from an AC vent will cool the plate, halting the vaporization process entirely.
Common Mistakes When Buying Resin Gear
In my decade of evaluating aromatics, I see consumers wasting hundreds of dollars on the wrong accessories. Let me save you the trouble by filtering out the marketing hype.
Mistake 1: Buying “Incense Cones” Instead of Raw Resin
Many beginners search for frankincense and end up buying pre-formed cones. Cones are roughly 20% resin and 80% sawdust, charcoal powder, and saltpeter binder. They burn quickly and smell like campfires. Always buy raw “tears” or “chunks.” If it looks like tree sap, it’s the real deal.
Mistake 2: Falling for the “Self-Lighting Resin” Gimmick
Some companies sell resin coated in flammable chemicals so you can light it directly with a match. Avoid this at all costs. The chemicals heavily taint the aroma, releasing toxic volatile organic compounds (VOCs) into your home. Pure resin cannot hold a flame on its own.
Mistake 3: Ignoring the Metal Gauge on Burners
When buying a brass or copper burner, weight matters. Cheap, stamped-metal burners available at fast-fashion retailers have very low thermal mass. They will overheat instantly, scorch the surface they sit on, and burn your fingers. Always look for “cast” or “solid” brass, which safely absorbs and dissipates the thermal energy.
What to Expect: Real-World Scent Performance
If your only experience with frankincense is synthetic candles or essential oil diffusers, burning the raw resin will be a revelation. But you need to know how the scent profile evolves over time to avoid disappointment.
Minute 1-3: The “Bloom”
As the heat hits the resin, the lightest molecules (monoterpenes) vaporize first. This is the “bloom.” It smells sharp, bright, and intensely citrusy—often compared to green apples, lime peel, or fresh pine needles. This is the most sought-after phase of the burn.
Minute 4-10: The “Heart”
The resin melts completely into a bubbling puddle. Heavier sesquiterpenes release. The bright citrus fades, replaced by a deep, rich, balsamic earthiness. This is the classic “ancient temple” aroma. It is grounding, slightly sweet, and heavy.
Minute 11+: The “Char”
If you are using charcoal, all the oils have now evaporated. What remains is the structural plant matrix (gums and water-soluble compounds). This will begin to burn. The scent will turn bitter, acrid, and smoky. Expert tip: This is your cue to remove the spent resin from the heat source. Do not let it sit and ruin the beautiful fragrance you just built up in the room.
Long-Term Cost & Maintenance Analysis
Let’s calculate the Total Cost of Ownership (TCO) for a daily resin burner. The initial purchase price of the gear is just the beginning; the consumables are where the true costs lie.
If you burn one piece of resin daily using the traditional method, you will consume one Three Kings charcoal tablet a day. At roughly $20 for a box of 100, charcoal costs you about $73 annually. Add in the cost of bulk resin (like the Sensari 1lb bag at ~$40, which lasts about six months), and your yearly running cost is approximately $150.
Conversely, an electric heater costs about $50 upfront. It uses negligible electricity (a 15-watt draw). You eliminate the charcoal cost entirely. Furthermore, because electric heaters extract oils so efficiently, you use about 50% less resin to achieve the same room-filling scent. Therefore, the electric route pays for itself within the first four months of daily use.
Maintenance Reality Check:
Charcoal burners require zero technical maintenance—just dump the cold ashes in the trash. Electric burners, however, require rigorous hygiene. If you allow spilled resin to bake onto the heating element, it will permanently insulate the ceramic, dropping its maximum temperature output. Always use foil cupcake liners or thick aluminum foil shaped into a miniature bowl on top of your electric heating plate. This one hack extends the life of your device by years.
✨ Don’t Miss These Exclusive Deals!
🔍 Ready to transform your space? Click the highlighted products throughout this guide to check current availability and secure the exact tools you need for a perfect, smokeless burn.
Conclusion
Mastering how to burn frankincense resin transforms a frustrating, smoky chore into a deeply rewarding daily ritual. The key takeaway from my years of testing is that heat management dictates everything. You are not trying to build a bonfire; you are trying to coax delicate oils out of ancient tree sap.
Whether you opt for the historical authenticity of the Attar Mist Brass Burner paired with Three Kings Charcoal, or the modern, respiratory-friendly precision of the Golden Lotus Electric Heater, your gear matters. Stop throwing raw, expensive Boswellia tears onto un-ashed, blistering hot coals. Respect the thermal dynamics, use a sand bed, wait for the ash, and experience the pure, citrus-pine brilliance that has made this resin a global treasure for millennia.
FAQs
❓ What is the best way to light frankincense resin without smoke?
✅ To achieve a smokeless burn, you must use an electric resin heater with an adjustable thermostat. Set the temperature to around 180°C (350°F). This vaporizes the essential oils without combusting the plant matter, eliminating carbon smoke entirely…
❓ Can you burn frankincense resin safely indoors?
✅ Yes, but ventilation is key if using charcoal. Always open a window to allow carbon monoxide to escape. For strictly sealed indoor environments, switch to an electric heater or a tealight-powered burner to prevent indoor air pollution and particulate buildup…
❓ Why does my frankincense smell like burning wood?
✅ You are applying too much heat or leaving the resin on the coal for too long. Once the essential oils vaporize (usually after 3-5 minutes), the remaining plant gum begins to char. Remove the spent black crust immediately…
❓ Do I need charcoal to burn frankincense resin?
✅ No. While charcoal is the traditional method, you can use electric heaters, tealight brass burners, or even place a piece of heavy aluminum foil over a low-heat stovetop element to gently melt and vaporize the resin…
❓ How long does a piece of frankincense resin burn?
✅ On a red-hot charcoal tablet, a pea-sized piece of resin flashes off its oils in 3 to 5 minutes. On a low-heat electric burner, that exact same piece can continuously release a gentle fragrance for 45 to 60 minutes…
Recommended for You
- 7 Best glass incense burner bowl Options for a Serene 2026 Home
- 7 Best Ceramic Incense Burner Holder Options for a Zen Home 2026
- How Long Does Incense Burn? 5 Powerful Pro Tips to Maximize Burn Times in 2026
Disclaimer: This article contains affiliate links. As an Amazon Associate, I earn from qualifying purchases. If you purchase products through these links, we may earn a small commission at no additional cost to you.
✨ Found this helpful? Share it with your friends! 💬🤗